The Truth About Hardwood Floor Refinishing: Setting the Record Straight
Beneath every worn, tired hardwood floor lies the potential for striking beauty and renewed life. Homeowners often imagine the refinishing process as a weekend project that restores floors to showroom perfection. The reality is more nuanced. A flawless hardwood floor refinishing requires a blend of skill, planning, and realism about what the process can , and cannot , achieve.
Why Refinishing Is Not Always Simple
Refinishing hardwood floors is not just about sanding down the surface and slapping on a new coat of finish. Every floor tells a story through its scratches, stains, and subtle warping. The age of the wood, previous treatments, and even the subfloor conditions play critical roles in how refinishing unfolds. Ignoring these variables can lead to disappointment or even irreversible damage.
Common Expectations vs. Reality
Many expect a quick fix that erases years of wear, but some issues, like deep gouges or water damage, require more than just sanding. Others assume every hardwood can handle multiple refinishings; in truth, some older floors are simply too thin for another round. The journey to flawless floors means confronting these realities head-on.
Myth 1: You Must Sand Down to Bare Wood Every Time
The image of a floor sander roaring to life is iconic, but full sanding is not always necessary. In fact, aggressive sanding can shorten the lifespan of your floors.
When Full Sanding Is Necessary
Deep scratches, uneven boards, and stubborn stains often demand a complete sanding to bare wood. This process strips away old finish and minor surface damage, creating a blank canvas for a new finish. However, it also removes a thin layer of the wood itself, which is finite.
Alternatives to Complete Sanding and Their Benefits
In many cases, a process called “screen and recoat” offers a gentler alternative. This method lightly abrades the existing finish without touching the wood, then adds a fresh protective layer. It rejuvenates floors with minor surface wear, preserves the wood’s thickness, and saves both time and money. Spot repairs and blending techniques also allow for targeted fixes rather than full-scale sanding.
Myth 2: Any Finish Will Protect Hardwood Floors Equally
Choosing a finish is not just about color or sheen. The type of finish you select determines durability, maintenance, and even the feel underfoot.
Differences Between Oil-Based, Water-Based, and Polyurethane Finishes
Let’s break down the primary finish options:
| Finish Type | Appearance | Drying Time | Odor/Emissions | Durability | Maintenance |
|——————|———————|————-|—————-|————–|————–|
| Oil-Based | Warm, ambered tone | 8-24 hours | Strong VOCs | High | Moderate |
| Water-Based | Clear, less yellowing| 2-4 hours | Low VOCs | Moderate-High| Easy |
| Polyurethane | Varies (oil or water)| Varies | Varies | Highest | Easy |
Oil-based finishes develop a rich, golden hue and are prized for longevity. Water-based finishes preserve the wood’s natural tone and dry quickly, making them family-friendly. Polyurethane, available in both oil and water-based formulas, offers top-tier protection against scratches and spills.
Which Finish Suits Your Floor and Lifestyle Best?
Busy households with pets and children often opt for high-durability polyurethane. Those seeking a classic, aged look may lean toward oil-based products. If a rapid turnaround and low-odor environment matter most, water-based finishes are ideal. Always consider the floor’s wood type and the demands of daily life before making a choice.
Myth 3: Refinishing Is Only a Cosmetic Upgrade
Refinishing does more than just restore lost luster. It safeguards the structural integrity of your hardwood floors.
Structural Benefits of Proper Refinishing
Over time, minor cracks and gaps can develop, allowing moisture and debris to penetrate. A fresh finish seals the wood, preventing water infiltration and stopping small imperfections from becoming major problems. Well-maintained floors are less likely to warp or cup, especially in humid environments.
How Refinishing Extends Hardwood Floor Lifespan
Each refinishing preserves the wood beneath, extending its usable life by decades. A neglected finish, on the other hand, leaves the floor vulnerable to deep, irreparable damage. Regular care turns hardwood floors into a legacy feature that lasts for generations.
Myth 4: DIY Refinishing Saves Significant Money
The allure of DIY is strong, especially with countless tutorials promising professional results on a budget. However, the hidden pitfalls can make the savings evaporate quickly.
Hidden Costs and Risks of DIY Refinishing
Renting equipment, buying quality finishes, and purchasing safety gear can add up. Inexperience can lead to uneven sanding marks, swirl patterns, and even permanent gouges in the wood. Mistakes often require professional intervention, negating any initial savings.
When to Call a Professional for Optimal Results
Complex situations , such as dealing with old stains, uneven boards, or historic floors , demand expert attention. Professionals have access to advanced tools and techniques, ensuring a flawless finish and minimizing dust and disruption. Trusted specialists, like Mebesa hardwood floor refinishing, provide valuable guidance and peace of mind, especially for high-value or irreplaceable flooring.
Myth 5: Refinishing Is a One-Time Task Per Floor Lifetime
Some believe refinishing is a once-in-a-lifetime event. In reality, hardwood floors can be refinished multiple times, depending on their thickness and condition.
How Often Should Hardwood Floors Be Refinished?
Most solid hardwood floors can tolerate three to five full sandings over their lifetime. Frequency depends on wear, traffic, and maintenance. On average, floors require refinishing every 7 to 10 years, but lighter touch-ups can extend this interval.
Maintenance Tips to Prolong Finish and Floor Health
– Place mats at entryways to trap grit and moisture.
– Sweep or vacuum regularly to prevent scratches.
– Use furniture pads to prevent dents.
– Clean spills promptly with a slightly damp cloth.
– Avoid harsh chemicals and steam mops.
Diligent care reduces the need for frequent refinishing, saving time and money in the long run.
Essential Preparations Before Refinishing
Success starts with preparation. Skipping this step can derail the entire process.
Assessing Floor Condition and Damage
Inspect the floor for deep gouges, loose boards, or water damage. Test the thickness of the wood to ensure it can tolerate sanding. Look for areas of discoloration, pet stains, or warped planks that may need replacement rather than refinishing.
Tools and Materials You’ll Need
– Floor sander (drum or orbital, depending on skill)
– Edge sander for corners
– Sandpaper (various grits)
– Vacuum and tack cloths
– Wood filler for minor cracks
– Chosen finish (oil-, water-based, or polyurethane)
– Applicators (brushes, rollers, or pads)
– Safety gear (goggles, respirator, ear protection)
Having everything on hand streamlines the process and minimizes downtime.
The Refinishing Process Demystified
Understanding each stage ensures a smoother experience and a more beautiful result.
Step-by-Step Refinishing Workflow
- Clear the Room: Remove all furniture, rugs, and baseboards.
- Repair and Clean: Fix loose boards, fill gaps, and clean thoroughly.
- Sand the Floor: Start with a coarse grit, progressing to finer grits for a smooth finish.
- Vacuum and Tack: Remove all dust between sanding passes.
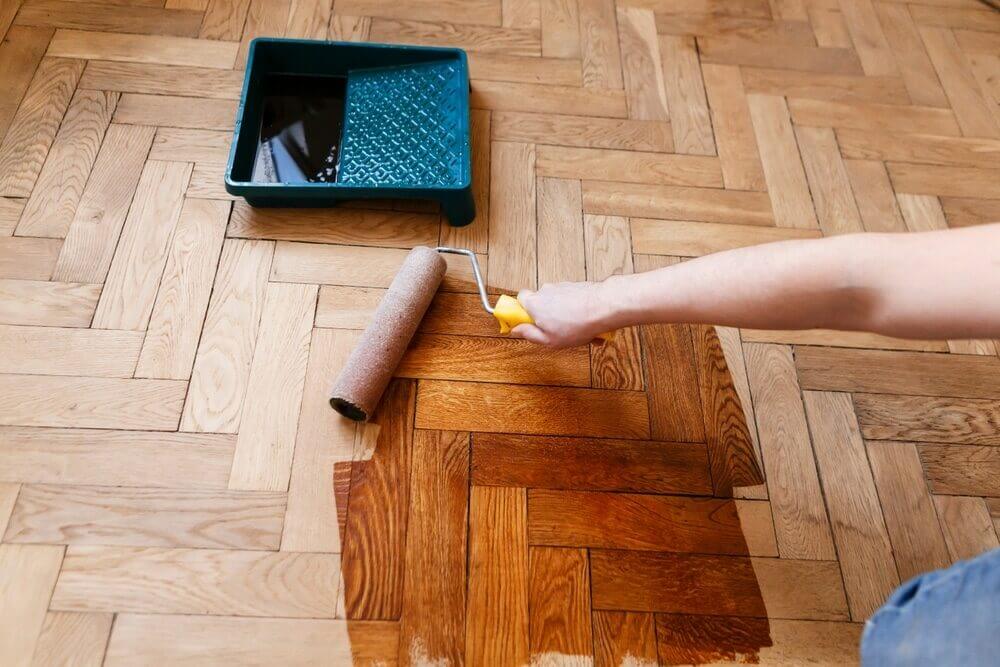
- Apply Stain (Optional): If changing the color, apply stain according to manufacturer instructions.
- First Finish Coat: Apply the first coat evenly; let it dry fully.
- Buff and Recoat: Lightly buff and clean before applying subsequent coats.
- Final Cure: Allow the finish to cure completely before heavy use.
Common Mistakes to Avoid
– Skipping sanding grits, leading to a rough surface.
– Failing to clean dust, resulting in gritty finishes.
– Applying thick coats that never fully cure.
– Rushing between steps or underestimating drying times.
Post-Refinishing Care and Maintenance
The journey does not end when the last coat dries. Early and ongoing care makes all the difference.
Immediate Aftercare Tips
Limit foot traffic for at least 24-48 hours. Avoid placing rugs or heavy furniture until the finish has fully cured, which may take up to a week. Keep pets off the surface during this time.
Long-Term Cleaning and Protection Strategies
Regular sweeping and gentle cleaning maintain the new sheen. Use only products approved for hardwood floors to avoid residue buildup. Control indoor humidity to prevent seasonal expansion and contraction. Protective mats in high-traffic areas, combined with mindful furniture placement, extend the finish’s life.
Achieving flawless hardwood floor refinishing requires more than enthusiasm; it demands attention to detail, up-to-date knowledge, and respect for the unique story each floor tells. By separating myth from reality and understanding every stage of the process, homeowners can reveal the enduring beauty beneath their feet , and keep it shining for years to come.